Zone 2 Heart Rate Explained
“Zone 2” usually describes a steady, moderate training intensity that sits below hard intervals and above easy recovery. In practice, people use a heart-rate range to keep workouts in that band, aiming for an effort that feels sustainable for long sessions. A common example is a 45–90 minute ride or run where breathing is noticeably faster than at rest, but you can still speak in short sentences without gasping.
Physiologically, Zone 2 is often associated with a balance between oxygen supply and demand where the body relies heavily on aerobic metabolism. That balance is not a single fixed heart-rate number for everyone. Heart rate reflects the combined effects of workload, fitness, temperature, hydration status, sleep, stress, and even caffeine. Two people can both be “in Zone 2” by feel while showing different heart-rate values.
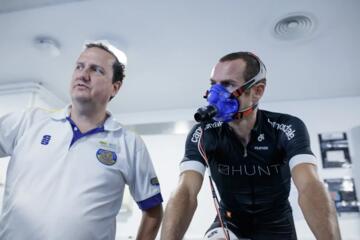
Most heart-rate-based Zone 2 plans come from formulas (like percentages of maximum heart rate) or from testing (like lactate threshold or ventilatory thresholds). Those methods produce different ranges, so the same label can map to different physiological intensities. A heart-rate monitor can also lag behind real effort, especially during hills, accelerations, or when cadence changes quickly.
Why People Misread Zone 2
A frequent mistake is treating Zone 2 as a universal number. Percentage-of-max methods can place beginners too high, because their maximum heart rate estimate is often off and their aerobic system has not yet adapted. When the effort is actually closer to Zone 3, sessions accumulate fatigue and the workout stops being “easy enough” to recover from.
Another common error is using a heart-rate target without checking how the body responds. Heart rate rises with heat, dehydration, anxiety, pain, and poor sleep. Someone can hit the “Zone 2” heart-rate band while their breathing and muscle effort feel harder than expected, which can shift the workout toward a higher-intensity stimulus.
Some people also confuse “staying in the range” with “staying at the same intensity.” On a hilly route, heart rate may drift upward even if the effort is steady. If you keep pushing to hold the monitor’s number, you can overshoot the intended intensity. The reverse also happens: if you slow down too much to keep heart rate from rising, you may end up under-stimulating the aerobic system.
Biologically, the body’s fuel use and oxygen handling change gradually across intensities rather than switching instantly at one heart-rate. That means Zone 2 is a practical window, not a precise boundary. If you train too low, you may spend time in a recovery-like range with limited aerobic stimulus. If you train too high, you increase reliance on faster energy pathways and accumulate more lactate and ventilatory strain, which can reduce the ability to repeat sessions consistently.
Set Zone 2 With Verification
Use A Talk Test And RPE
Heart-rate targets work best when paired with a simple intensity check. A practical approach is the talk test: during Zone 2 effort, you can usually speak in short phrases without needing to stop for breath. If you can only manage single words or you must pause to inhale, the intensity is likely above the intended band.
Perceived exertion (RPE) adds another layer. Many people find Zone 2 corresponds to an RPE around 3–4 on a 10-point scale, where the effort is clearly working but not uncomfortable. This does not replace heart rate; it helps interpret it when conditions change. If your heart rate is “in range” but RPE is 6–7, you are likely training harder than the label suggests.
In practice, start the session slightly below your target heart rate and watch how it behaves over 10–20 minutes. A stable Zone 2 effort often shows a gradual rise early on, then a steadier plateau. If heart rate climbs steadily while RPE also rises, the workload may be too high for the intended intensity.
Choose A Range Method
Zone 2 ranges come from different calculations, and the method changes the meaning of the number. Percentage-of-max heart rate is easy but can be inaccurate because maximum heart rate varies widely between individuals. Threshold-based methods use physiological markers such as lactate threshold or ventilatory thresholds, which better reflect where intensity shifts from mostly aerobic to more mixed or higher-intensity metabolism.
If you have access to a lab or field test, threshold-based Zone 2 can be more consistent across training blocks. If you do not, you can still create a workable range by using your own data. One approach is to identify a heart-rate band where you can sustain steady effort for 30–60 minutes with stable breathing and RPE, then refine it over several sessions.
In practice, record heart rate and RPE during a few steady workouts on similar terrain. Look for the band where you can keep form and pacing consistent. Over time, you can narrow the range to the heart-rate values that match your “talkable” effort.
Account For Drift And Conditions
Heart rate drift is common during long sessions. Even at the same pace, heart rate can rise as you warm up, as glycogen availability changes, or as you become dehydrated. Temperature and wind can also raise cardiovascular strain. If you treat the initial heart-rate number as a fixed target, you may unintentionally push harder later in the workout.
A practical way to handle drift is to use a moving target based on effort rather than a strict ceiling. For example, if your heart rate rises by 5–10 beats per minute over the first 20–30 minutes while RPE stays in the talk-test zone, you can keep the session going at the same perceived effort. If heart rate rises while RPE rises too, reduce pace or resistance.
Tools that help include pace or power targets (for cycling), cadence consistency, and environmental notes. On a treadmill or indoor trainer, you can better control workload and reduce variability. Outdoors, expect more fluctuation and use the talk test as the tie-breaker.
Structure Workouts For Consistency
Zone 2 training is usually most useful when it is repeatable. A common structure is one or more longer sessions each week, plus shorter steady sessions to build aerobic volume. The exact weekly distribution depends on your total training load, but the key idea is to keep most sessions in a recoverable intensity range.
In practice, start with a duration you can complete while maintaining talk-test breathing and stable RPE. Many people begin with 20–40 minutes and progress by adding time gradually across weeks. If you are already training, you can convert part of your easy sessions to Zone 2 by adjusting pace or resistance until the talk test matches your target.
Realistic outcomes depend on baseline fitness and total training volume. People often notice improved ability to sustain moderate effort and a lower heart rate at the same pace after several weeks of consistent aerobic training. Those changes are not guaranteed and can be limited by sleep, stress, nutrition, and overall training load.
Educational Case Examples
Example 1: Runner With Heat Drift
A recreational runner uses a heart-rate formula to set Zone 2 at a specific range. On a warm morning, the first 15 minutes feel easy and the talk test works, but heart rate steadily rises and breathing becomes harder by minute 30. The runner keeps pace because the monitor shows “still in range,” but RPE climbs from 4 to 6. The next session, the runner starts slower and uses the talk test to guide effort; the heart rate still drifts upward, yet RPE stays in the intended zone and the workout feels repeatable.
Example 2: Cyclist Using Threshold Estimates
A cyclist has a threshold-based Zone 2 range from a field test. During a windy ride, power output stays steady, but heart rate varies from the low end to the high end of the band. The cyclist checks perceived exertion and finds breathing remains controlled and conversation is possible in short phrases. Instead of forcing heart rate to a narrow number, the cyclist keeps power steady and uses the talk-test feel to confirm the intensity stays in Zone 2.
Zone 2 Checklist And Comparison
| Method | What It Targets | Strengths | Limitations |
|---|---|---|---|
| Percent Of Max HR | A fixed intensity fraction | Quick to set without testing | Max HR estimates can be off; heat and stress shift HR |
| Threshold-Based HR | Physiological transition points | Often maps better to metabolic intensity | Requires testing; thresholds can drift with training and conditions |
| Feel-Guided Zone | Breathing and effort stability | Works when HR is noisy | Requires practice to calibrate; may be harder to reproduce precisely |
Step-by-step Zone 2 check during a session:
- Start at a pace or resistance that feels “easy but working,” where you can speak in short phrases.
- Note your heart rate after 10–15 minutes; expect some rise as you warm up.
- Keep RPE in the talk-test zone; if RPE rises above that zone, reduce workload even if heart rate stays within the band.
- If heart rate drifts upward but RPE stays stable, continue at the same perceived effort and let the heart-rate number follow.
- End the session feeling like you could repeat it later the same day; if you feel unusually taxed, the intensity likely ran high.
Common Mistakes To Avoid
One mistake is chasing a narrow heart-rate window. Zone 2 is a range, and forcing a specific number can lead to unnecessary pace changes that raise fatigue. Another mistake is ignoring the difference between steady and variable workouts. Intervals, stop-and-go traffic, and hills can cause heart-rate lag and overshoot, so a monitor reading alone can misclassify the effort.
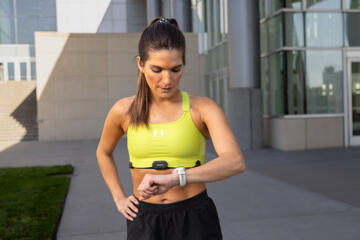
People also forget that heart-rate sensors vary. Wrist-based optical sensors can be less accurate during running or when grip and motion change. Chest straps usually track more reliably, but even they can show artifacts from poor contact or signal interference. If your readings jump erratically, use RPE and talk test to correct course.
Finally, some people treat Zone 2 as a substitute for total training planning. Aerobic volume matters, but recovery, strength work, and overall weekly load still determine whether training improves fitness or increases injury risk. If you feel persistent soreness, sleep disruption, or declining performance across weeks, the issue is often total load rather than the heart-rate label.
FAQ
What Heart-Rate Range Is Zone 2?
Zone 2 heart-rate ranges differ by method and person. Percentage-of-max formulas, threshold-based testing, and feel-guided calibration can each produce different numbers, so the most reliable approach matches heart rate with talk-test breathing and stable perceived exertion.
How Do I Know If My Zone 2 Is Too High?
If you cannot speak in short phrases, your breathing becomes strained, or your RPE rises well above a moderate level during a steady session, the intensity is likely above Zone 2 even if the monitor shows “in range.”
Why Does My Heart Rate Climb During Zone 2?
Heart rate drift can occur from heat, dehydration, stress, warm-up effects, and changing workload. If RPE stays in the talk-test zone while heart rate rises, the session can still be appropriate; if RPE rises too, reduce pace or resistance.
Should I Use A Wrist Or Chest Heart-Rate Monitor?
Chest straps often provide more consistent readings during running and rapid movement, while wrist sensors can be noisier. If your heart-rate data looks erratic, rely more on talk test and RPE to guide intensity.
How Long Should I Train In Zone 2?
Common practice ranges from 20–40 minutes for beginners to longer steady sessions for more experienced trainees, with gradual progression. The best duration is the one you can complete while maintaining talk-test breathing and recover well enough to repeat training.
Author's Insight
Zone 2 is best understood as a practical intensity window tied to aerobic metabolism and manageable breathing, not as a single universal heart-rate number. Heart rate is a useful proxy, but it responds to heat, hydration, stress, sensor accuracy, and workout variability. Pairing heart-rate targets with talk-test breathing and RPE reduces misclassification when conditions change. Over several sessions, you can refine your range by observing where effort stays steady and repeatable.
Key Takeaways
- Zone 2 is a moderate, steady effort window; heart-rate numbers vary by person and by how the range was calculated.
- Use talk test and RPE to interpret heart-rate readings, especially when heat, stress, or terrain change.
- Expect heart-rate drift during long sessions; adjust based on perceived effort, not only the monitor.
- Choose a range method you can verify in real workouts, then refine it using consistent sessions over time.